Understanding the potential causes behind manhole connector leaks is integral to proper installation techniques and maintenance. In our experience, the majority of reported gasket and connector field problems arise from installation issues. Uncover some common hiccups that may cause product problems or failure down the line, and take a proactive approach in helping prevent these risks.
Improper Installation
In no particular order, here are some aspects/scenarios that often cause improper installation of our manhole connectors, which could result in leaks:
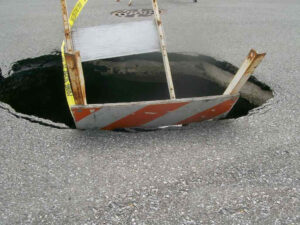
A common result of leaking manhole connectors is sink holes.
- Unstable, uneven bedding
- Unauthorized repairs
- Improper butyl sealant placement
- Unequalized rubber gaskets
- Incorrect stacking
- Lack of understanding regarding manhole vacuum test standards
- Careless assembly
- Chipped, broken, or cracked openings on manhole
Proper Installation
A manhole connector might look more complicated because of its steel take-up clamps, but we can assure you it’s actually a fairly easy process. View installation steps for our popular PSX: Direct Drive, for example:
- Clean the pipe section at least three feet from the insertion end.
- Center the pipe in the opening until the pipe breaks the plane of the manhole. On tight boot throat openings, lube can be used.
- Attach the take-up clamp or clamps. For one clamp and boot with two grooves, the clamp goes on first groove.
- Tighten each clamp to 60 inch-pounds.
- Adjust the pipe to the line and grade.
- Use proper bedding and backfill materials and techniques so that pipe deflection and deformation are minimized.
Gaskets are just as easy to install, if not easier. Take our 4G profile gasket, for example:
- Clean the step portion and bell, ensuring there are no chips or imperfections. Patch all bugholes.
- Stretch the gasket over the spigot and seat the squared area against the step with the gasket print facing you.
- Making one-and-a-half revolutions around the structure, equalize the gasket by utilizing the pinch, pull, and snap technique. You can also insert a metal object beneath the gasket.
- After equalizing, ensure the rear of the gasket is seated against the hole’s step.
- Heavily lubricate the bell and entrance slope. Lubricating the gasket on a profile gasket is optional.
- Align the pipe sections squarely and home slowly.
Proactive Approach
We want to help ease installation processes as much as possible. By listing some common application mistakes and errors, we hope this will support a proactive approach toward proper installation and maintenance, thereby lowering manhole connector leaks caused by human error. Installation questions? Reach out to us toll free at (800) 348-7325 or locally at (260) 436-0521.
Related Articles
- How to Install Cast-A-Seal 603
- How to Install Kwik Seal
- Boot Connector Inspection: What to Look for When Your Gasket Arrives
- Boot Connector Considerations
- How Do Take-Up Clamps Work?
- How to Seal a Watertight Connector
- The Ultimate PSX: Direct Drive Cheat Sheet
- 6 Manhole Connectors Meeting ASTM C923
- Stop Mortaring Manhole Connectors
- Can You Use the PSX: Direct Drive in an 8-Inch Hole?


